
Posted by Electric Solenoid Valves on Jul 7th 2026
Solenoid Valve Rebuild Kits: How to Choose the Right Kit
Solenoid Valve Rebuild Kits: How to Choose the Right Kit
A solenoid valve rebuild kit can help restore a valve when the internal sealing parts are worn, damaged, or no longer seating correctly. Instead of replacing the entire valve, a rebuild kit lets you service the parts most likely to wear during normal operation.
The frustrating part is that many rebuild kit problems initially look like other valve problems. A leaking valve may have a worn diaphragm, but it may also have debris under the seat, the wrong pressure condition, a faulty coil, or be installed in the wrong direction. Before ordering parts, it is worth narrowing down the problem so you do not replace good components and still end up with the same leak.
The most important rule is simple: a rebuild kit must match the exact valve series, valve size, seal material, and valve position. A kit that looks close is not close enough. If the internal parts do not match the valve, the valve may leak, fail to open, fail to close, or become unsafe to return to service.
This guide explains what a solenoid valve rebuild kit does, when to use one, when to replace the full valve, and how to choose the correct kit.
What Is a Solenoid Valve Rebuild Kit?
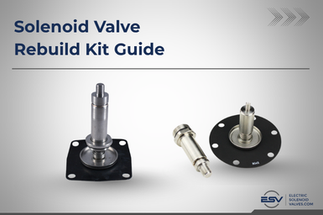
A solenoid valve rebuild kit is a set of replacement internal parts used to service a compatible solenoid valve. These are usually the parts exposed to the fluid or gas flowing through the valve.
Depending on the valve series, a rebuild kit may include parts such as:
- Diaphragm
- Seal
- Spring
- Stem
- Other internal sealing or wetted components
The exact parts depend on the valve design. Always check the product page before ordering.
A rebuild kit is mainly used to restore sealing and internal movement. It does not replace the valve body, coil, electrical connector, threads, or external piping connection.
That distinction matters. If the valve body is cracked, the coil is burned out, or the valve was never correct for the application, a rebuild kit will not solve the root problem.
When a Solenoid Valve Rebuild Kit Makes Sense
A solenoid valve repair kit makes sense when the issue is inside the valve, and the main valve body is still in good condition.
Good rebuild candidates usually have one of these symptoms:
|
Symptom |
Why a Rebuild Kit May Help |
|
The valve leaks through the outlet when closed |
The diaphragm or seal may be worn, damaged, or blocked by debris |
|
The valve opens or closes slowly |
Internal parts may be sticking, worn, or contaminated |
|
The valve clicks but does not control the flow correctly |
The electrical side may be working, while the internal parts are not moving or sealing properly |
|
The valve worked for a long time, then started leaking |
Normal wear may have affected the internal sealing parts |
|
Internal parts look worn during inspection |
Replacing the internal parts may restore function |
A rebuild kit is often practical when the valve has been reliable in the same application and only recently started showing signs of internal wear.
For example, if a valve has been controlling water successfully for years and now leaks through the outlet when closed, the diaphragm or seal may be the problem. In that case, replacing the solenoid valve diaphragm may be a better first step than replacing the entire valve.
When a Rebuild Kit Will Not Fix the Valve
A rebuild kit does not fix every solenoid valve problem. If the issue is electrical, structural, or application-related, replacing internal parts will not solve the root cause.
Do not depend on a rebuild kit when:
|
Problem |
Better next step |
|
The coil does not energize |
Check power, wiring, voltage, or replace the coil |
|
The coil is burned, cracked, or damaged |
Replace the coil |
|
The valve body is cracked or heavily corroded |
Replace the valve |
|
Threads are damaged |
Replace the valve or repair the piping connection |
|
The valve is installed backward |
Reinstall in the correct flow direction |
|
Media is not compatible with the valve materials |
Select a compatible valve |
|
Pressure is outside the valve’s rating |
Choose a valve rated for the actual pressure |
|
The valve position is wrong for the system |
Replace with the correct normally closed or normally open valve |
A rebuild kit can restore a compatible valve. It cannot make the wrong valve correct for the application.
If the same failure keeps happening after rebuilds, stop treating it as a parts issue. The valve may be exposed to incompatible media, dirty fluid, incorrect pressure, excessive heat, or poor installation conditions.
Rebuild Kit vs Replacement Coil
A rebuild kit and a replacement coil solve different problems. The rebuild kit services the internal wetted side of the valve. The coil services the electrical actuation side.
Use this quick check before ordering parts:
|
What you see |
Check first |
|
No click when power is applied |
Power supply, wiring, voltage, coil |
|
The coil is hot, burned, cracked, or damaged |
Replacement coil |
|
The valve clicks but does not open or close correctly |
Internal parts, diaphragm, debris, pressure |
|
The valve leaks when closed |
Diaphragm, seal, valve seat, debris |
|
Valve works sometimes, but sticks |
Internal contamination, unstable voltage, and pressure conditions |
If the valve does nothing when power is applied, do not start with a rebuild kit. Start with the electrical side.
If the valve energizes but still leaks or fails to control flow, the internal parts are worth checking.
Will an Electricsolenoidvalves Rebuild Kit Work on a Valve From Another Brand?
Do not assume an Electricsolenoidvalves rebuild kit will fit a solenoid valve from another brand. Rebuild kits are designed around specific internal parts, not just pipe size, voltage, or valve position.
Two valves can both be 1/2 inch normally closed valves and still use different diaphragms, springs, stems, and sealing surfaces. If those internal parts do not match, the valve may leak, fail to open, fail to close, or become unsafe to return to service.
Electricsolenoidvalves rebuild kits should only be used with the compatible Electricsolenoidvalves valve series listed on the product page. If your valve came from another manufacturer, do not order an Electricsolenoidvalves rebuild kit based on size alone.
This is different from replacing the entire valve. When replacing a full valve from another brand, you can compare specifications such as port size, thread type, voltage, body material, seal material, pressure range, media temperature, and normally closed or normally open function. But for a rebuild kit, the internal geometry needs to match the original valve.
If the original brand’s rebuild kit is unavailable, replacing the full valve with a properly matched Electricsolenoidvalves valve may be the better option. This is especially true if the valve brand or model number is unclear, the body is damaged, the coil is failing, or the valve has failed more than once in the same application.
If you are unsure, contact Electricsolenoidvalves with a photo of the valve label, a photo of the full valve body, the coil voltage, the media being controlled, and the failure symptom. If rebuild kit compatibility cannot be confirmed, full valve replacement is usually the safer choice.
Before You Order a Rebuild Kit
Do not order based on pipe size alone. Two valves can both be 1/2 inch NPT and still use different internal parts.
Before buying a solenoid valve rebuild kit, confirm:
- Valve series
- Port size
- Normally closed or normally open position
- Seal material
- Media type
- Whether the coil still energizes
- Whether the valve body is cracked, corroded, or damaged
- Whether the valve was installed in the correct flow direction
If any of these details are unclear, identify the valve first. Guessing can lead to a kit that does not fit.
A good rule: if you cannot confirm the valve series, do not order the rebuild kit yet. Check your order history, review the model number, or contact Electricsolenoidvalves before buying.
How to Choose the Right Solenoid Valve Rebuild Kit
The safest way to choose a solenoid valve rebuild kit is to match the kit to the valve, not just the pipe size.
Here is what to check.
1. Match the Valve Series
Rebuild kits are valve‑series specific. A kit designed for one valve family may not fit another, even if both use the same port size.
For PSL Series valves, use the PSL Series Solenoid Valve Rebuild Kit with EPDM Seal, Normally Closed (SKU: PSL REBUILD).
For SZW or BZW Series valves, use the Solenoid Valve Rebuild Kit with Seal (SKU: REBUILD), available in both normally closed and normally open options.
- View SZW/BZW Rebuild Kit here
- Unknown series: Check your order history, model number, or give us a call before ordering.
These kits are designed for specific valve series and positions. They cannot be used to convert a valve from normally closed to normally open (or vice versa). Always confirm valve series, size, and seal material before ordering.
2. Match the Valve Size
Valve size matters because the diaphragm and internal sealing parts must match the valve body and orifice.
A 1/2 inch valve and a 1-inch valve may have the same basic function, but their internal parts are not interchangeable.
Common rebuild kit sizes may include:
- 1/2 inch
- 3/4 inch
- 1 inch
- 1-1/4 inch
- 1-1/2 inch
- 2 inch
Do not measure only the outside of the pipe or fitting. Confirm the valve’s listed port size.
3. Match the Valve Position
A rebuild kit must match the valve’s default position.
The two most common positions are:
|
Valve position |
What it means |
|
Normally closed |
The valve stays closed until the power opens it |
|
Normally open |
The valve stays open until the power shuts it off |
This part is critical: a rebuild kit does not convert a normally closed valve into a normally open valve. It also does not convert a normally open valve into a normally closed valve.
If your system needs the opposite default position, you need the correct valve type, not just a rebuild kit.
4. Match the Seal Material
Seal material affects media compatibility, temperature resistance, and service life.
For Electricsolenoidvalves rebuild kits, check the seal material listed on the product page. One rebuild kit may use a Viton diaphragm, while another may use an EPDM diaphragm.
Do not assume seal materials are interchangeable.
|
Seal material |
General use note |
|
Viton/FKM |
Commonly used where chemical and temperature resistance are needed, depending on the media |
|
EPDM |
Commonly used for water and certain compatible fluids, depending on the application |
The correct material depends on what is flowing through the valve. Water, air, oil, fuel, mild chemicals, and corrosive media can require different valve and seal materials.
If the original seal failed quickly, do not just install the same type of kit without checking compatibility. The media may be attacking the seal material.
5. Confirm the Media and System Conditions
A rebuild kit should not be selected in isolation. The valve still has to match the system.
Before rebuilding, confirm:
- Media type
- Operating pressure
- Media temperature
- Flow direction
- Valve orientation
- Cycle frequency
- Debris level
- Whether the valve requires minimum pressure
- Whether the application needs zero differential operation
If the valve is being used outside its intended pressure, temperature, or media range, rebuilding may only provide a temporary fix.
Common Reasons Solenoid Valves Need Rebuild Kits
Most solenoid valve rebuild situations come from wear, contamination, or compatibility problems.
Debris in the Valve
Debris is one of the most common causes of leakage. Small particles can prevent the diaphragm or seal from seating correctly.
Common debris sources include:
- Sand
- Pipe scale
- Rust
- Thread sealant fragments
- Installation debris
- Sediment in water lines
If debris caused the failure, clean the valve body carefully before installing new parts. A strainer or filter upstream of the valve can help protect the replacement parts.
This is one of the easiest mistakes to miss. A valve can be rebuilt correctly and still leak if debris remains on the seat.
Normal Seal Wear
Internal seals and diaphragms can wear over time. This is especially common in valves that cycle frequently.
Signs of normal wear may include:
- Slow response
- Internal leakage
- Weak sealing
- Visible diaphragm wear
- Valve performance that gradually gets worse
If the valve has worked well in the same application for a long time, normal wear is a reasonable rebuild scenario.
Chemical or Temperature Damage
A seal can harden, swell, crack, or deform if the media is not compatible with the material.
This is where rebuilding can become a trap. If the valve failed because the material was wrong for the fluid, installing a new kit with the same material may lead to another failure.
Check the media and temperature before rebuilding.
Pressure Problems
Some solenoid valves need a minimum pressure to operate correctly. Others are designed for low-pressure or zero differential applications.
If the pressure condition is wrong, the valve may leak, chatter, fail to open, or fail to close. A rebuild kit will not correct a pressure mismatch.
Before blaming the internal parts, confirm that the valve type matches the pressure conditions in the system.
Installation Issues
A valve installed in the wrong flow direction can act like it has an internal failure. The same can happen if the valve is under piping stress or if debris enters during installation.
Before rebuilding, check:
- Flow direction arrow
- Pipe support
- Thread sealant use
- Valve orientation
- Cleanliness of the line
- Connection tightness
A rebuild kit should be installed only after the basic installation issues are ruled out.
Basic Solenoid Valve Rebuild Process Overview
The exact steps depend on the valve model, but the general process follows the same logic.
Before servicing any valve, isolate the system safely. Shut off power, relieve pressure, and follow appropriate lockout/tagout practices when stored electrical, pneumatic, hydraulic, chemical, or pressure energy may be present.
General rebuild process:
- Confirm the valve model, series, size, position, and seal material.
- Shut off the electrical power to the valve.
- Isolate upstream and downstream flow.
- Relieve pressure from the line.
- Drain or contain media as needed.
- Remove the valve from service if required.
- Open the valve body carefully.
- Inspect the diaphragm, seal, spring, stem, seat, and internal surfaces.
- Clean debris from the valve body and sealing surfaces.
- Install the new rebuild kit parts in the correct orientation.
- Reassemble the valve without over-tightening.
- Reinstall the valve in the correct flow direction.
- Restore pressure slowly and check for leaks.
- Energize the valve and test several open-close cycles.
If the valve still leaks after rebuilding, stop and inspect the valve body, seat, coil, voltage, pressure conditions, and material compatibility.
Solenoid Valve Rebuild Kit Compatibility Checklist
Use this checklist before ordering a solenoid valve rebuild kit.
|
Item to confirm |
Why it matters |
|
Valve series |
Rebuild kits are not universal |
|
Valve size |
Internal parts must match the valve body |
|
Normally closed or normally open |
Kits do not convert valve position |
|
Seal material |
Must be compatible with the media |
|
Valve body condition |
Cracked or corroded bodies should be replaced |
|
Coil condition |
Rebuild kits do not fix electrical failure |
|
Flow direction |
Incorrect installation can mimic an internal failure |
|
Pressure range |
Wrong pressure can cause poor operation |
|
Media cleanliness |
Debris can damage the new parts quickly |
Rebuild or Replace the Valve?
A rebuild kit is usually the better choice when the valve has been working correctly, and the issue is limited to worn internal parts.
A full valve replacement is usually the better choice when the valve is damaged, incorrectly selected, or no longer compatible with the system.
|
Choose a rebuild kit when... |
Choose a new valve when... |
|
The valve body is still in good condition |
The body is cracked, warped, or corroded |
|
The coil still works |
The coil, body, and internal parts all have issues |
|
The problem appears to be the diaphragm or seal |
The valve is wrong for the pressure or the media |
|
You can identify the exact valve series and size |
You cannot confirm the valve model |
|
The valve has been reliable until normal wear occurred |
The same failure keeps happening after service |
If you are unsure, start by identifying the valve model and failure symptom. Rebuilding is cost-effective only when the internal parts are the real problem.
Final Thoughts
A solenoid valve rebuild kit is a practical way to restore a valve with worn or damaged internal sealing parts. It can help stop internal leakage, restore normal opening and closing, and extend the life of a compatible valve.
The keyword is compatible.
Before ordering a kit, confirm the valve series, valve size, valve position, and seal material. Do not use a rebuild kit to change a valve from normally closed to normally open, or from normally open to normally closed. If the system needs a different fail-safe position, replace the valve with the correct type.
A rebuild kit is not the right fix for every failure. If the coil is bad, the body is damaged, the media is incompatible, or the valve was not selected for the pressure conditions, replacing internal parts will not solve the root problem.
When the valve is correctly matched and the issue is internal wear, a rebuild kit can be the simplest and most cost-effective repair.
Need Help Finding the Right Kit?
A rebuild kit is cost‑effective when the valve body is sound and the issue is internal wear. If the coil is bad, the body is cracked, or the valve was never right for the application, replacement is the smarter move. Give us a call at 800‑983‑8230 or email us at sales@electricsolenoidvalves.com.