
Posted by Electric Solenoid Valves on Jul 25th 2025
Can You Fix Your Solenoid Valve, or Is It Time for a New One?
Solenoid Valve Repair vs. Replacement: A Cost & Maintenance Guide
Solenoid valves are unsung heroes in countless systems, from home irrigation and washing machines to sophisticated industrial controls. They precisely manage the flow of liquids and gases, but like any hardworking component, they can sometimes malfunction. When a valve acts up, that nagging question pops up: "Can I repair this, or do I need to bite the bullet and replace it?"
At ElectricSolenoidValves.com, we frequently hear this question. Many customers initially suspect a completely "dead" valve, but often, the issue is simpler than you think; sometimes, just a bit of debris causes a blockage. This guide will walk you through diagnosing common solenoid valve problems, weighing your repair options against replacement, and making an informed decision that saves you time, money, and hassle.
Understanding How a Solenoid Valve Works
Before we grab our tools, let’s quickly demystify how these clever devices operate. A solenoid valve is an electromechanical gatekeeper for fluid or gas flow. Unlike a manual valve, it uses an electrical current to open and close, making it perfect for automated systems.
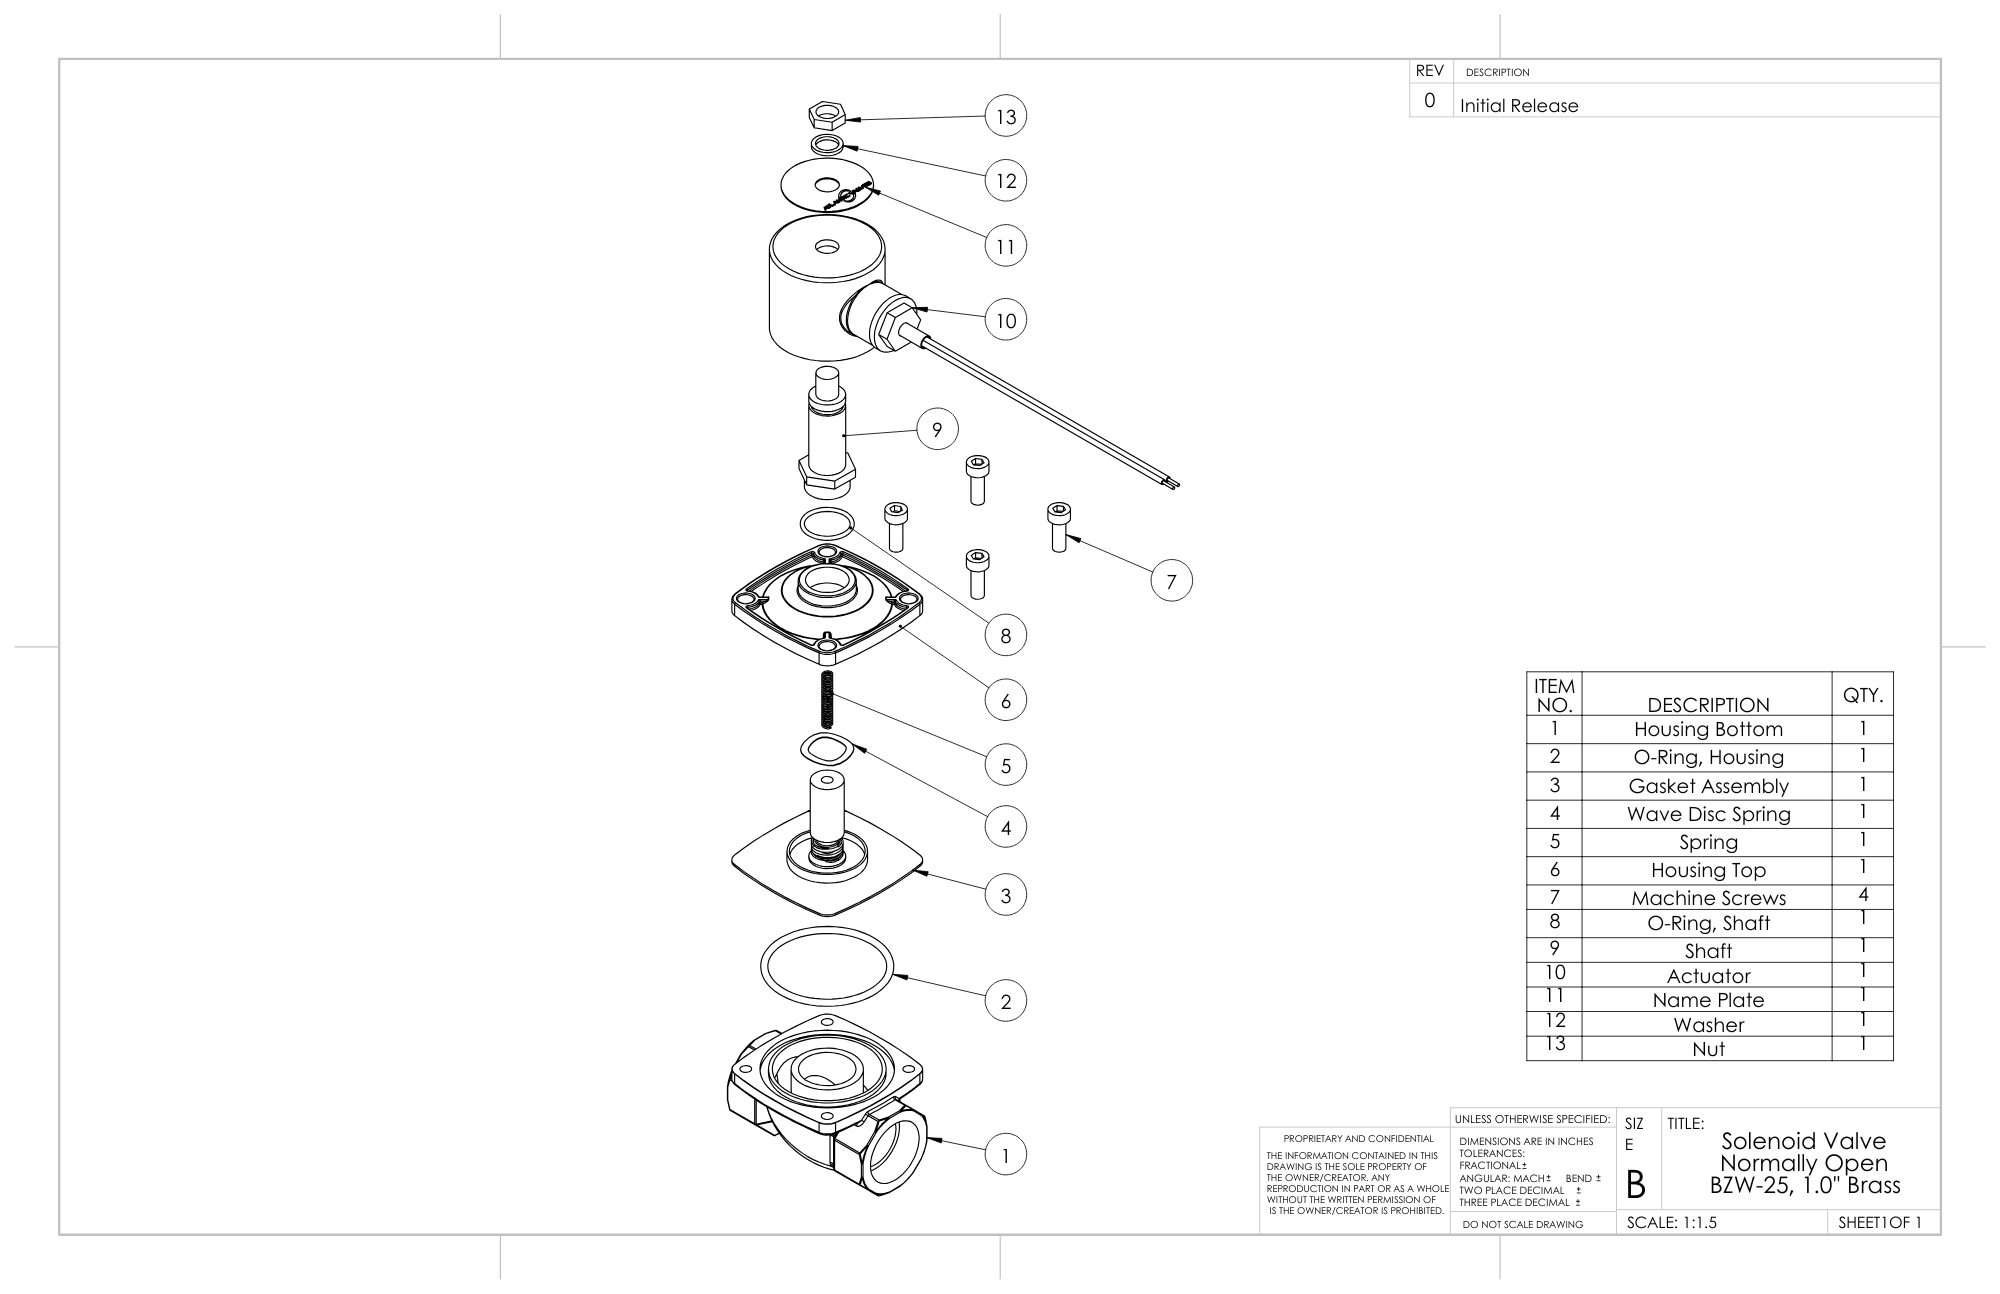
Key Components:
- Solenoid Coil: This is the heart of the electrical operation. When energized, it creates a magnetic field.
- Plunger/Armature: A movable metal rod or disc that gets pulled or pushed by the magnetic field, directly controlling the valve's opening or closing.
- Valve Body: The main housing that guides the fluid path and connects to your pipes.
- Orifice: The opening through which the fluid or gas flows.
- Spring: Often helps return the plunger to its default position when power is removed.
- Seal/Diaphragm: Crucial components that prevent leaks and ensure proper sealing when the valve is closed.
Here's a more detailed exploded view of Solenoid valves:
Telltale Signs Your Solenoid Valve Might Be Failing
Catching an issue early can prevent bigger problems down the line. Here are the most common signs that your solenoid valve needs attention:
- No Power / Not Changing Positions (Dead Valve): If nothing happens when power is applied, it could be an electrical issue (no power getting to the coil) or a burnt-out coil.
- Humming But Not Actuating: You hear a distinct hum when the valve should operate, but nothing happens. This usually means the coil is energized, but the plunger or armature is stuck, often due to debris or a worn internal part.
- Leaking: Any visible drips or puddles around the valve body, at the connections, or even from an exhaust port (if applicable) clearly indicates a failed seal, diaphragm, or a crack in the valve body itself.
- Inconsistent Operation: The valve works intermittently, opens slowly, or closes sluggishly. This erratic behavior can be tricky but often points to issues with the coil, plunger movement, or internal components.
- Overheating Coil: While a working coil will feel hot, upwards of 185°F, excessive heat can indicate incorrect voltage, insufficient air flow, or a coil struggling against a stuck plunger.
Repair vs. Replacement: Making the Right Call
Deciding between repair and replacement hinges on several factors: the nature of the fault, the cost and availability of parts, and your comfort level with the repair process.
When Repair Might Be a Viable Option
Repairing a solenoid valve can be a smart, cost-effective choice, especially for common, straightforward issues.
- Minor Issues & Clogs: We often find that what seems like a major failure is just debris lodged in the orifice or plunger, preventing proper sealing or movement. A thorough cleaning might be all it needs! Similarly, if only the solenoid coil is burnt out while the rest of the valve is sound, replacing just the coil is a relatively easy fix.
- Cost-Effectiveness for Specific Parts: For larger or more specialized industrial valves, individual components like a new diaphragm, spring, or plunger can be inexpensive to replace compared to the cost of a brand-new unit.
Availability of Repair Kits
Many manufacturers offer replacement parts for components considered consumable. For the solenoid valve, this includes the internal wetted components, such as the diaphragms, springs, and plungers, as well as the electrical components, such as the solenoid coils. ElectricSolenoidValves.com carries specific solenoid valve rebuild kits that include all internal wetted parts, as well as replacement coils. These replacement parts make repairs easy and cost-effective.
When Replacement Is the Smarter Choice
While it is tempting to repair, there are critical times when replacing the entire solenoid valve is the safer, more economical, and ultimately more reliable long-term solution.
- Extensive Damage or Corrosion: If the valve body is cracked, heavily corroded, or shows signs of irreparable physical damage, repair is rarely an option. A compromised body leads to leaks and potential system failure.
- Aging Valve / End of Lifespan: Like any mechanical device, solenoid valves have a finite lifespan. If your valve is quite old and has seen years of service, fixing one issue might only be a reprieve before another problem arises. Investing in a new valve often prevents recurring headaches.
- Safety Concerns: In applications involving hazardous fluids, high pressures, or critical safety functions, a faulty valve should almost always be replaced unless the repair is precisely defined by the manufacturer and meticulously executed. Don't compromise safety for a few dollars.
- Cost of Repair Outweighs Replacement: Always do a quick cost-benefit analysis. Sometimes, the cost of individual replacement parts, combined with your time and effort, can approach or even exceed the cost of a brand-new, often warrantied, solenoid valve.
- Complexity of the Repair for DIYers: Some solenoid valves are intricate, with many small parts. If the repair seems beyond your current skill level, or if specialized tools are required, a full replacement can save you frustration and potential damage to other components.
- Lack of Specific Parts: It’s important to remember that replacement parts aren't universal. You need parts specifically designed for your valve's make, model, and size. If a manufacturer no longer offers parts for your valve, or if the valve itself has been discontinued, replacement becomes your only viable option.
Step-by-Step: How to Diagnose and Potentially Clean Your Solenoid Valve
Before you decide, a systematic diagnosis is key. Here’s how we recommend approaching it:
Safety First!
Always disconnect power and relieve any pressure in the system before inspecting or working on a solenoid valve. Failure to do so can result in electric shock, burns, or serious injury. If dealing with fluids, have towels ready for spills.
Visual Inspection
- Look for Leaks: Are there any drips, puddles, or signs of moisture around the valve body or connections?
- Check for Damage: Is the valve body cracked, corroded, or visibly damaged?
- Inspect Wiring: Are the electrical connections secure and free from fraying, disconnections, or burn marks?
- Look for Debris: Debris lodged in the orifice or plunger can prevent proper sealing or movement.
Electrical Testing (Basic)
If the valve isn't activating, you'll need to check if the coil is getting power and if it's functional.
- Check for Voltage: Using a multimeter, carefully test for voltage at the coil's terminals when the system is supposed to activate the valve. If there's no voltage, the problem is likely upstream (e.g., wiring, switch, controller).
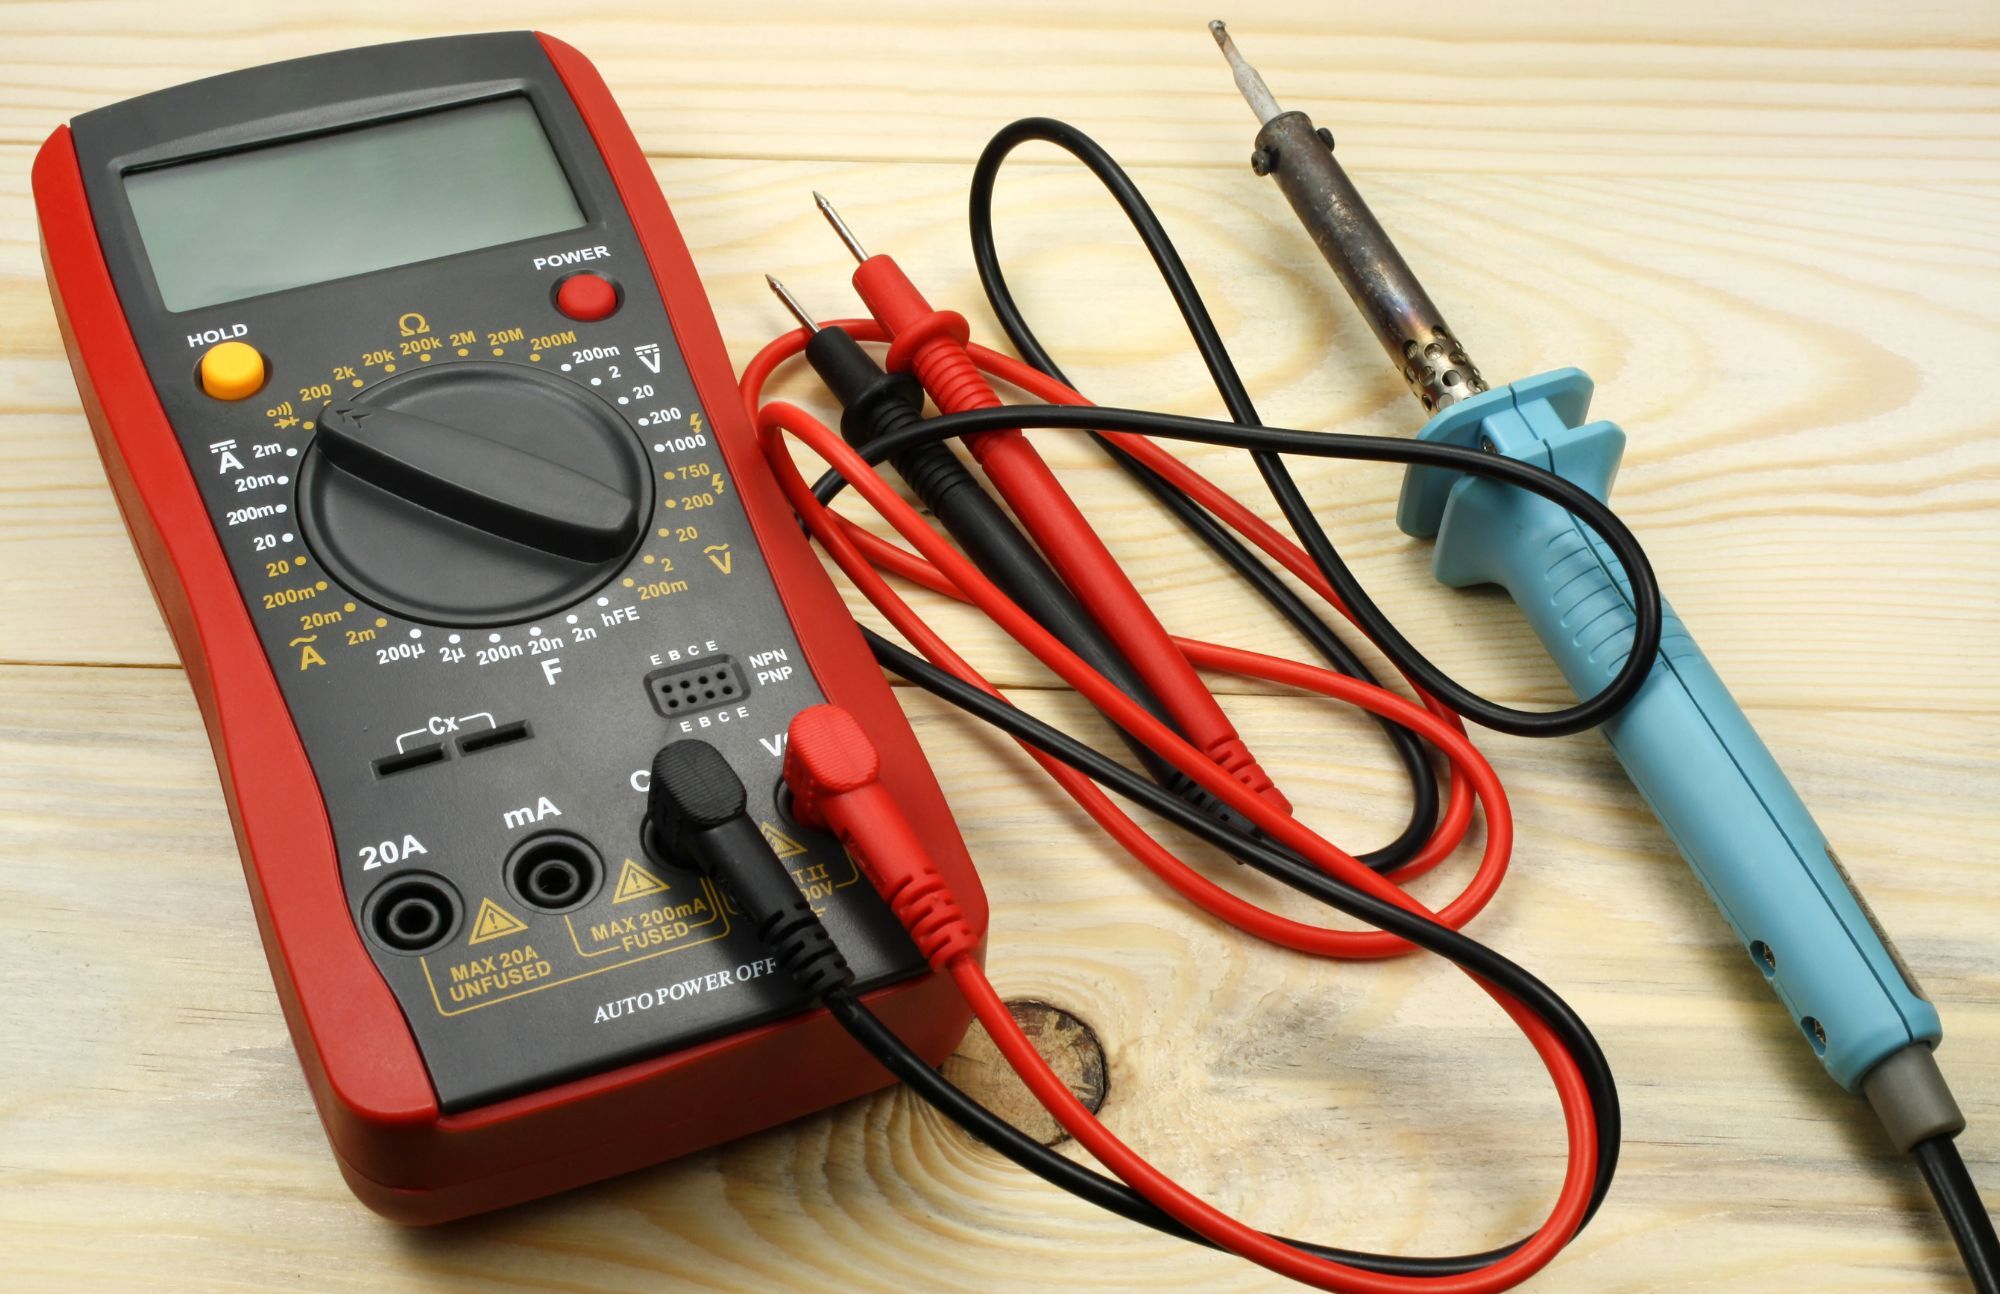
- Check Coil Resistance: With the power off and the coil disconnected, measure the resistance (ohms) across the coil terminals. A reading of infinity (open circuit) or zero (short circuit) usually indicates a bad coil. Compare your reading to the manufacturer's specifications if possible. For detailed guidance on using a multimeter for electrical tests, we recommend this helpful guide from Fluke.
Listen and Feel
- Listen for the "Click": When the valve is energized, you should hear a distinct click as the plunger actuates. If you hear a hum but no click, the plunger might be stuck.
- Feel for Vibration/Heat: A working coil will often have a slight hum and may feel warm to the touch (but not excessively hot) when energized.
- Check for Magnetic Pull: Solenoid Coils are magnets. When energized touch a metal screwdriver to the coil, you should feel a slight pull.
Detailed Cleaning Guide (for BZW/SZW type valves, common for DIYers)
If your diagnosis points to a clog, a good cleaning can often restore function. Here's a common procedure for many small to medium-sized solenoid valves:
Tools Required:
- Adjustable wrench
- Allen screwdriver
- Clean running water
- Soft brush (optional)
- Replacement diaphragm (if needed)
- Replacement coil (if needed)
Step-by-Step Instructions:
- Power Off & Disconnect: Ensure the valve is completely powered off and disconnected from any electrical source. Shut off the fluid supply and relieve any pressure in the system.
- Remove the Coil: Unscrew the nut on top of the coil using an adjustable wrench. Carefully lift and remove the coil from the valve body.
- Remove the Screws: Remove the four screws securing the valve body using an Allen screwdriver. Carefully take off the top section of the valve body to expose the diaphragm.
- Clean the Diaphragm: Gently remove the diaphragm from the valve body. Rinse it under clean running water to remove any debris or buildup. If needed, use a soft brush to remove stubborn particles.
- Inspect the Diaphragm: Check for any signs of wear, cracks, or tears. If the diaphragm is damaged, replace it. You can purchase replacement and rebuild kits for many of our valves directly on our site.
- Reassemble the Valve: Place the cleaned or new diaphragm back into position. Reattach the valve body and secure it with the four screws. Position the coil back onto the valve body and secure it with the top nut.
- Test the Valve: Reconnect the power and fluid supply. Run a test cycle to ensure the valve is operating correctly.
If the coil is no longer functioning properly, you can find replacement coils for a variety of our valves.
Weighing Your Options: A Quick Checklist
Use this table to help make your decision on whether to repair or replace:
|
Factor |
Consider Repair if... |
Consider Replacement if... |
|
Valve Body |
Intact, no cracks, minimal corrosion |
Cracked, heavily corroded, irreparable physical damage |
|
Replacement Parts |
Affordable, readily available, specific to your valve (e.g., rebuild kits) |
Unavailable, expensive, or no longer manufactured for your model |
|
Your Skill & Tools |
You have the necessary tools and feel confident in performing the repair reliably |
The repair seems beyond your skill level or requires specialized tools |
|
Application Risk |
Non-critical, low-risk if failure recurs (e.g., a simple irrigation zone) |
Involves hazardous fluids, high pressures, or critical safety functions |
|
Cost Analysis |
Repair costs are significantly less than a new, warrantied unit |
Repair cost approaches or exceeds the cost of a new valve |
|
Valve Age |
Relatively new or mid-lifespan |
Very old, nearing the end of expected lifespan, or prone to recurring issues |
If you answered "no" to multiple repair-friendly questions or if safety and long-term reliability are paramount, replacement is almost always the better choice.
Conclusion
Your solenoid valve is a vital component for the safe and efficient operation of your system. By methodically diagnosing failures and weighing the true costs and benefits of repair versus replacement, you can avoid unplanned downtime, safety hazards, and wasted resources. Whether it's a quick fix or a full upgrade, having a functional solenoid valve ensures your system runs smoothly.
Ready to get your system back in perfect working order? Find the right solution, whether it's a small part for a quick fix or a brand-new valve for lasting reliability! Our team of valve experts is here to provide fast, reliable support for every project — contact us today to find the right solution for your application.
FAQs
How long do solenoid valves typically last?
The lifespan of a solenoid valve varies greatly depending on its application, operating conditions (temperature, pressure, fluid type), and quality of manufacturing. Generally, they can last anywhere from a few hundred thousand to several million cycles, which could translate to 5-10+ years in typical home or light industrial use.
Can I use any repair kit for my solenoid valve?
No. It's crucial to use a repair kit specifically designed for your solenoid valve's make, model, and size. Universal kits rarely fit correctly and can lead to leaks or improper operation. Be sure to match voltage, port size, and configuration (normally open or normally closed) when ordering parts.
Is it hard to replace a solenoid valve?
For most standard applications, replacing a solenoid valve is a relatively straightforward task for a DIYer with basic plumbing and electrical skills. The most important steps are ensuring the power is off, pressure is relieved, and proper sealing materials (like Teflon tape or pipe dope) are used on threaded connections.
Why does my new solenoid valve keep failing?
If a new solenoid valve fails quickly, it often points to an underlying system issue, not the valve itself. Common causes include: dirty fluid (debris clogging the valve), operating outside the valve's pressure or temperature ratings, incorrect voltage supply, a constantly energized coil leading to overheating, or even incorrect flow direction (installed backward).
Are all solenoid valves normally open or normally closed?
Solenoid valves come in both "normally closed" (NC) and "normally open" (NO) configurations. A normally closed valve is closed when de-energized and opens when power is applied. A normally open valve is open when de-energized and closes when power is applied. It's important to know which type you have for proper system operation.