

1/2" 5 Port (4 Way), 2 Position Pneumatic Solenoid Valve
Availability: In Stock
Technical Details
SKU
4V410-15
Valve Type
4 Way, 5 Ports, 2 Position
Suitable Media
Clean Air (40 Micron Filter)
Operation Type
Single Solenoid | Air Return
Port Size
1/2" Female NPT | Body Ported
Exhaust Port Size
1/2" Female NPT
Flow Rate
Cv 2.79
Response Time
Less than 0.05 Seconds
Body Material
Aluminum Alloy
Seal Material
HNBR O-Ring
Power
AC: 4.0 VA | DC: 3 Watts
Insulation Class
Class F
Enclosure Rating
IP65 (DIN 40050)
Coil Duty
100% ED Continuous (Max. 5 Cycles/Sec.)
Temp Range
-4° to 158°F (Freezing not permitted)
Pressure Range
22 to 116 psi
Lubrication
Not Required
Height (without DIN connector)
1.97"
Length
6.64"
Width
1.34"
Weight
1lbs 2.6 oz
CAD Files
Available Upon Request
Product Overview
The 4V410-15 series pneumatic directional control valve is a reliable component designed for precise control in pneumatic systems. It is a 1/2" 4-Way, 2-Position Pneumatic Direction Control Valve with a single solenoid control and air return function.
The 4V410-15 valve features a 4-way design, allowing for two different flow positions. The valve has five Female NPT ports laser-etched onto its face, labeled as follows:
- P for the inlet or pressure port
- A and B for the outlets
- R and S for the exhausts.
When powered, the valve operates in the P to B and A to R positions. When the power is removed, it switches to the P to A and B to S positions. The valve also has a laser-etched position diagram for easy reference. It is referred to as a 4-way valve because two of these ports act as exhausts.
This valve is single-acting, with one solenoid controlling the position of the spool. It incorporates an air return function for reset.
The 4V410-15 valve is built with durable materials, including aluminum alloy and HNBR O-rings, to withstand demanding environments and repetitive use. Female NPT ports make this valve compatible with most US equipment, enabling easy integration into existing systems and compatibility with a wide range of pneumatic fittings. The valve is operated by a 100% ED-rated solenoid (continuous duty at room temperature) and is equipped with a manual override button.
The 1/2" 5 Port (4-Way), 2-Position Pneumatic Direction Control Valve from the 4V410-15 series is suitable for various industrial applications, pneumatic tools, and wherever precise control is needed. With its compact size, reliable performance, and sturdy construction, it serves as a versatile component for pneumatic systems.
Throughout the manufacturing process, the valve adheres to ISO9001 standards and is designed to fit seamlessly into existing manifolds and conforms to standard industry sizes.


Wiring Instructions
- Loosen and remove the Phillips-head screw securing the DIN connector to the coil.
- Detach the DIN connector from the coil.
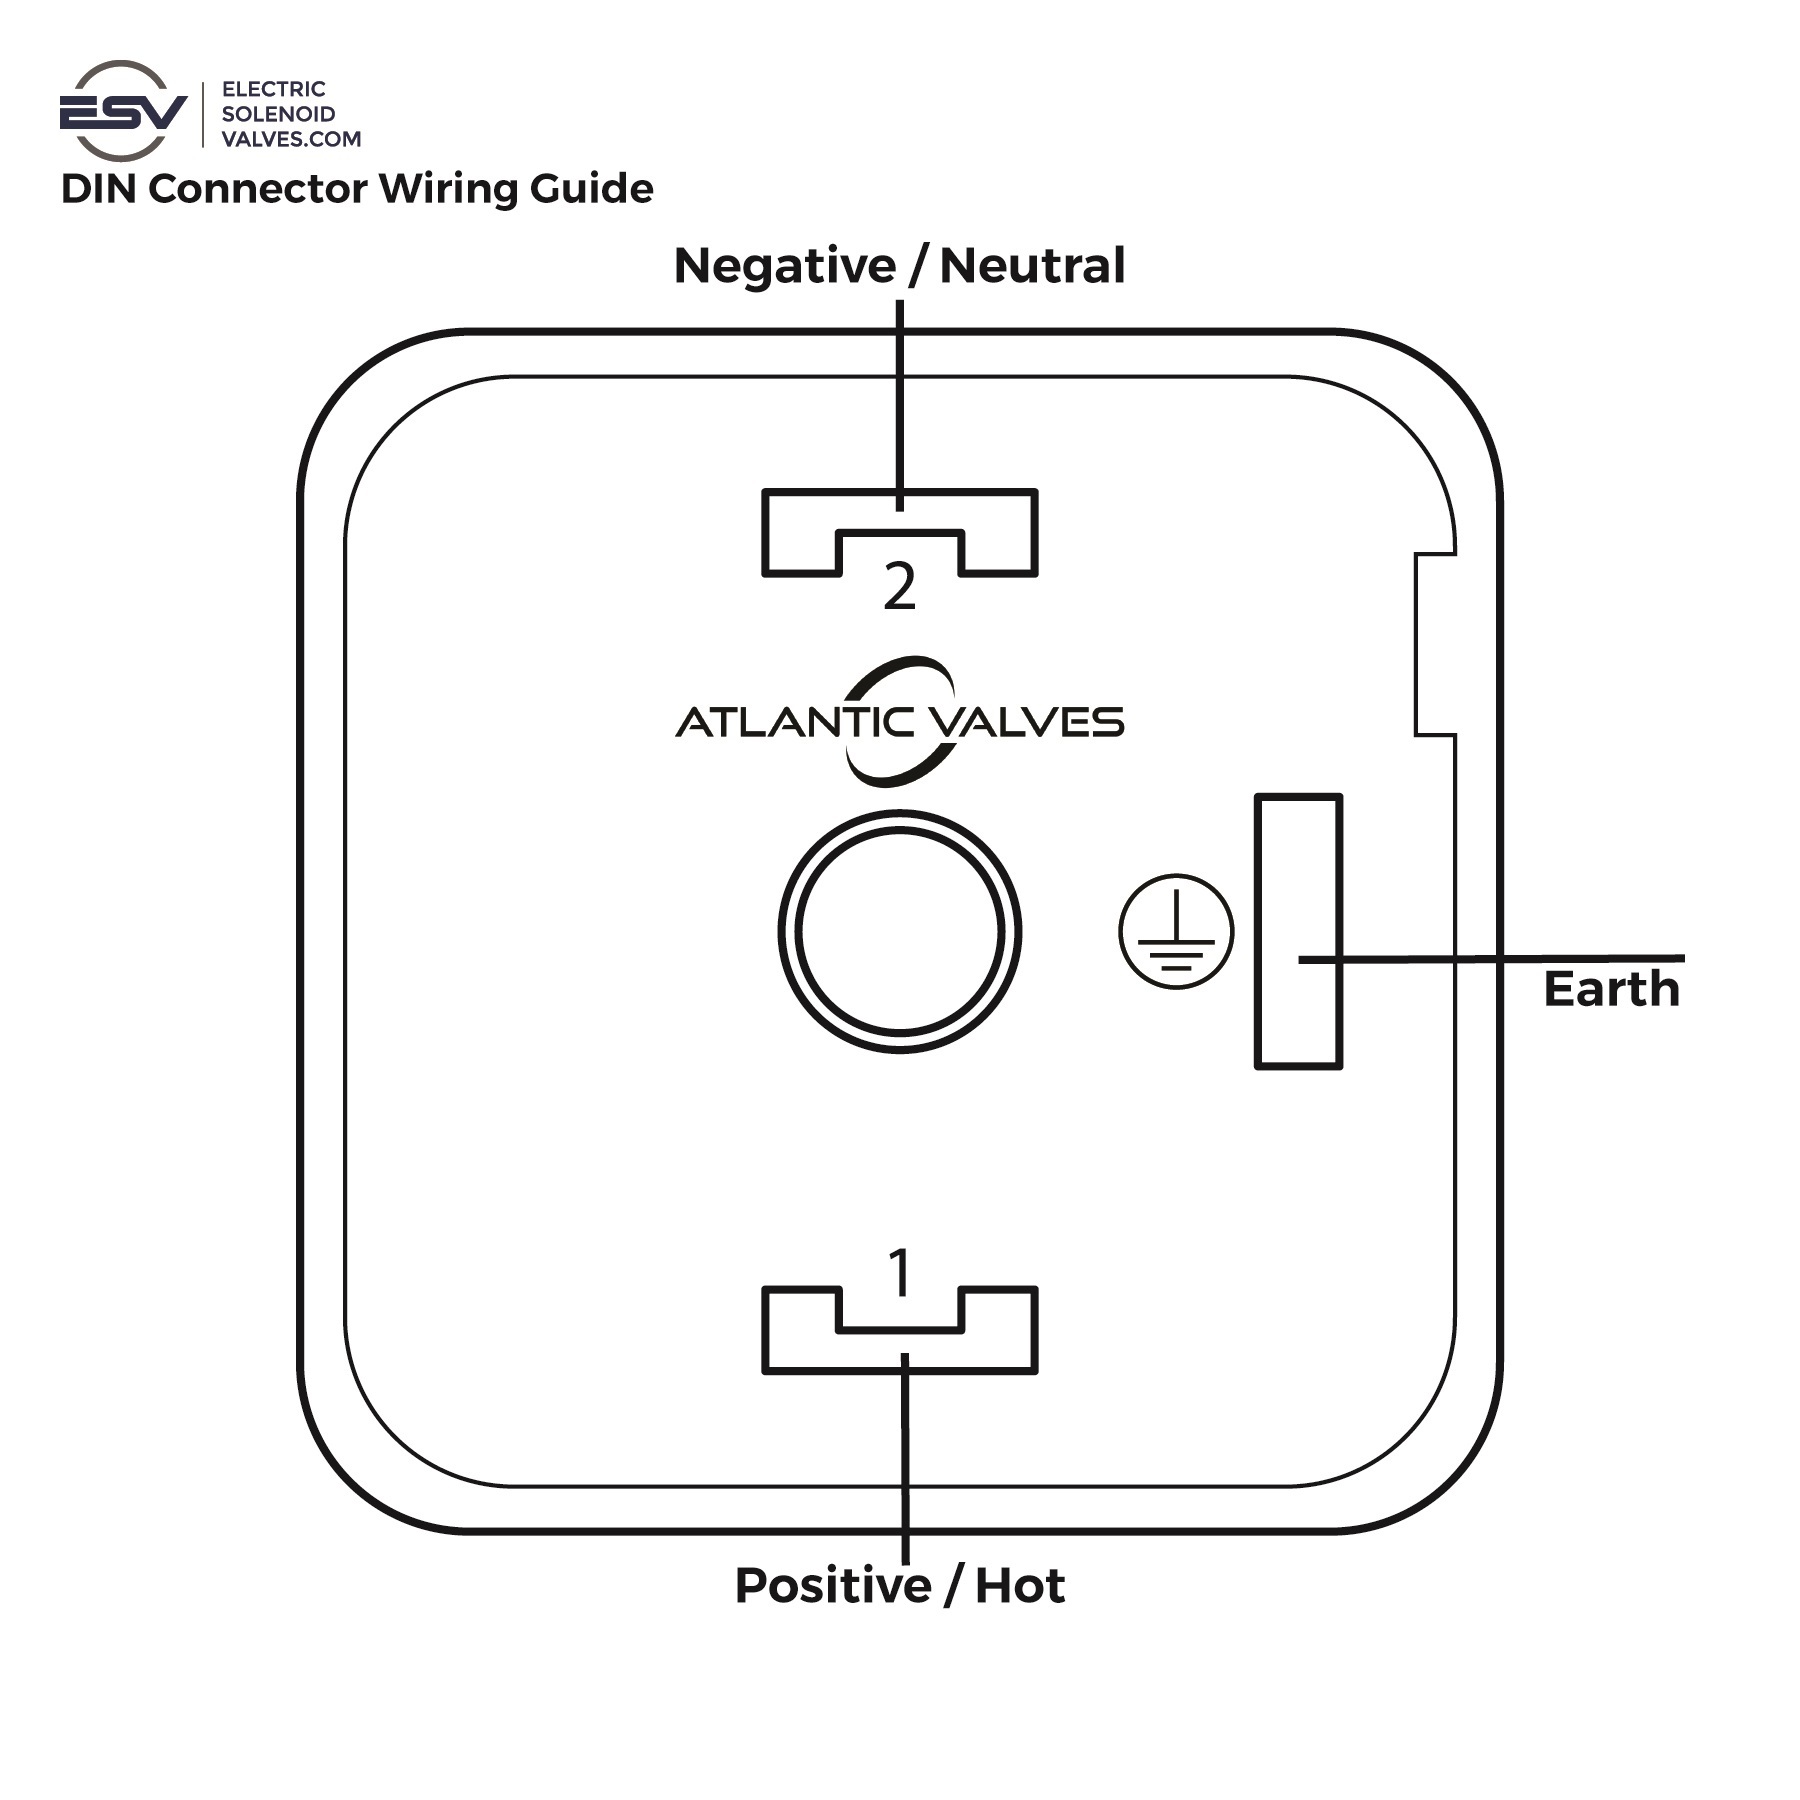
- Open the DIN connector housing by prying at the small slot located in the bottom corner next to the Earth terminal.
- Inside the housing, locate the screw terminals:
- Terminal 1: Connect the hot or positive wire.
- Terminal 2: Connect the neutral or negative wire.
- Earth Terminal (for AC voltages only): Connect the ground or Earth wire.
- Ensure all screw terminals are securely tightened for a reliable connection.
- Reassemble the DIN connector by reversing the steps above.