

3/8" Low Pressure Gas Solenoid Valve - N/O
Availability: In Stock
Technical Details
SKU
BCM-10K
Position
Normally Open
Port Size
3/8" Female NPT
Available Voltage
Select Above
Body Material
Brass
Components
Stainless Steel
Seal Material
NBR Diaphragm
Orifice Size
16 mm
Temp Range
15 to 140°F / -10 to 60°C
Pressure Range
0 - 60 PSI (No Minimum Pressure)
Flow Rate
Cv 2.1 (Appx 16 GPM @ 60 PSI)
Power
AC: 20VA / DC: 20 Watts
Coil Connection
DIN 43650A
Coil Class
Class H (356°F )
Response Time
Fast Acting (Less than one second)
Duty Cycle
100% Duty at Rated Ambient Temperature
*Suitable Media
Natural Gas, Propane, Inert Gases
Weight
1 lbs.
Height
4.61"
Length
2.68" port to port
Width
2.20"
CAD Files
Available Upon Request
Product Overview
The BCM-10K is a compact 3/8" brass solenoid valve engineered specifically for low- and zero-pressure gas control. Unlike standard piloted solenoid valves that require line pressure to operate, the BCM-10K uses a high-tension internal spring combined with an NBR diaphragm to create a positive, airtight seal at 0 PSI differential.
Important Application Notice:
-
-
- This valve is Normally Open (remains open when de-energized and closes when powered). It is not suitable for primary fuel-gas safety shutoff, as power loss will allow gas to flow.
- This configuration is intended for specialized setups such as double-block-and-bleed vent lines, purge systems, and sampling loops.
-
Key Features
-
Zero Differential Operation: Mechanical spring assistance ensures reliable seating under minimal or zero system pressure.
-
Normally Open Configuration: Keeps lines vented or flowing during power outages.
-
Durable Construction: Brass body, stainless steel internal components, and nitrile (NBR) seals compatible with natural gas, propane, and inert gases.
-
Compact Porting: 3/8" female NPT connections fit tight equipment enclosures, manifolds, and burner loops.
Common Applications
-
Vent lines in double-block-and-bleed burner safety trains
-
Low-pressure gas purge and ventilation systems
-
Gas analyzer sampling loops and test benches
-
Inert gas blanketing and distribution lines
-
Laboratory gas control and small furnace/kiln vent systems
Installation Note
This valve is directional. Ensure flow alignment with the arrow on the body. Backpressure or flow reversal will prevent the diaphragm from sealing properly. Verify system requirements, gas compatibility, and applicable local safety codes before installation.
Wiring Instructions:
- Loosen and remove the Phillips-head screw securing the DIN connector to the coil.
- Detach the DIN connector from the coil.
- Open the DIN connector housing by prying at the small slot located in the bottom corner next to the Earth terminal.
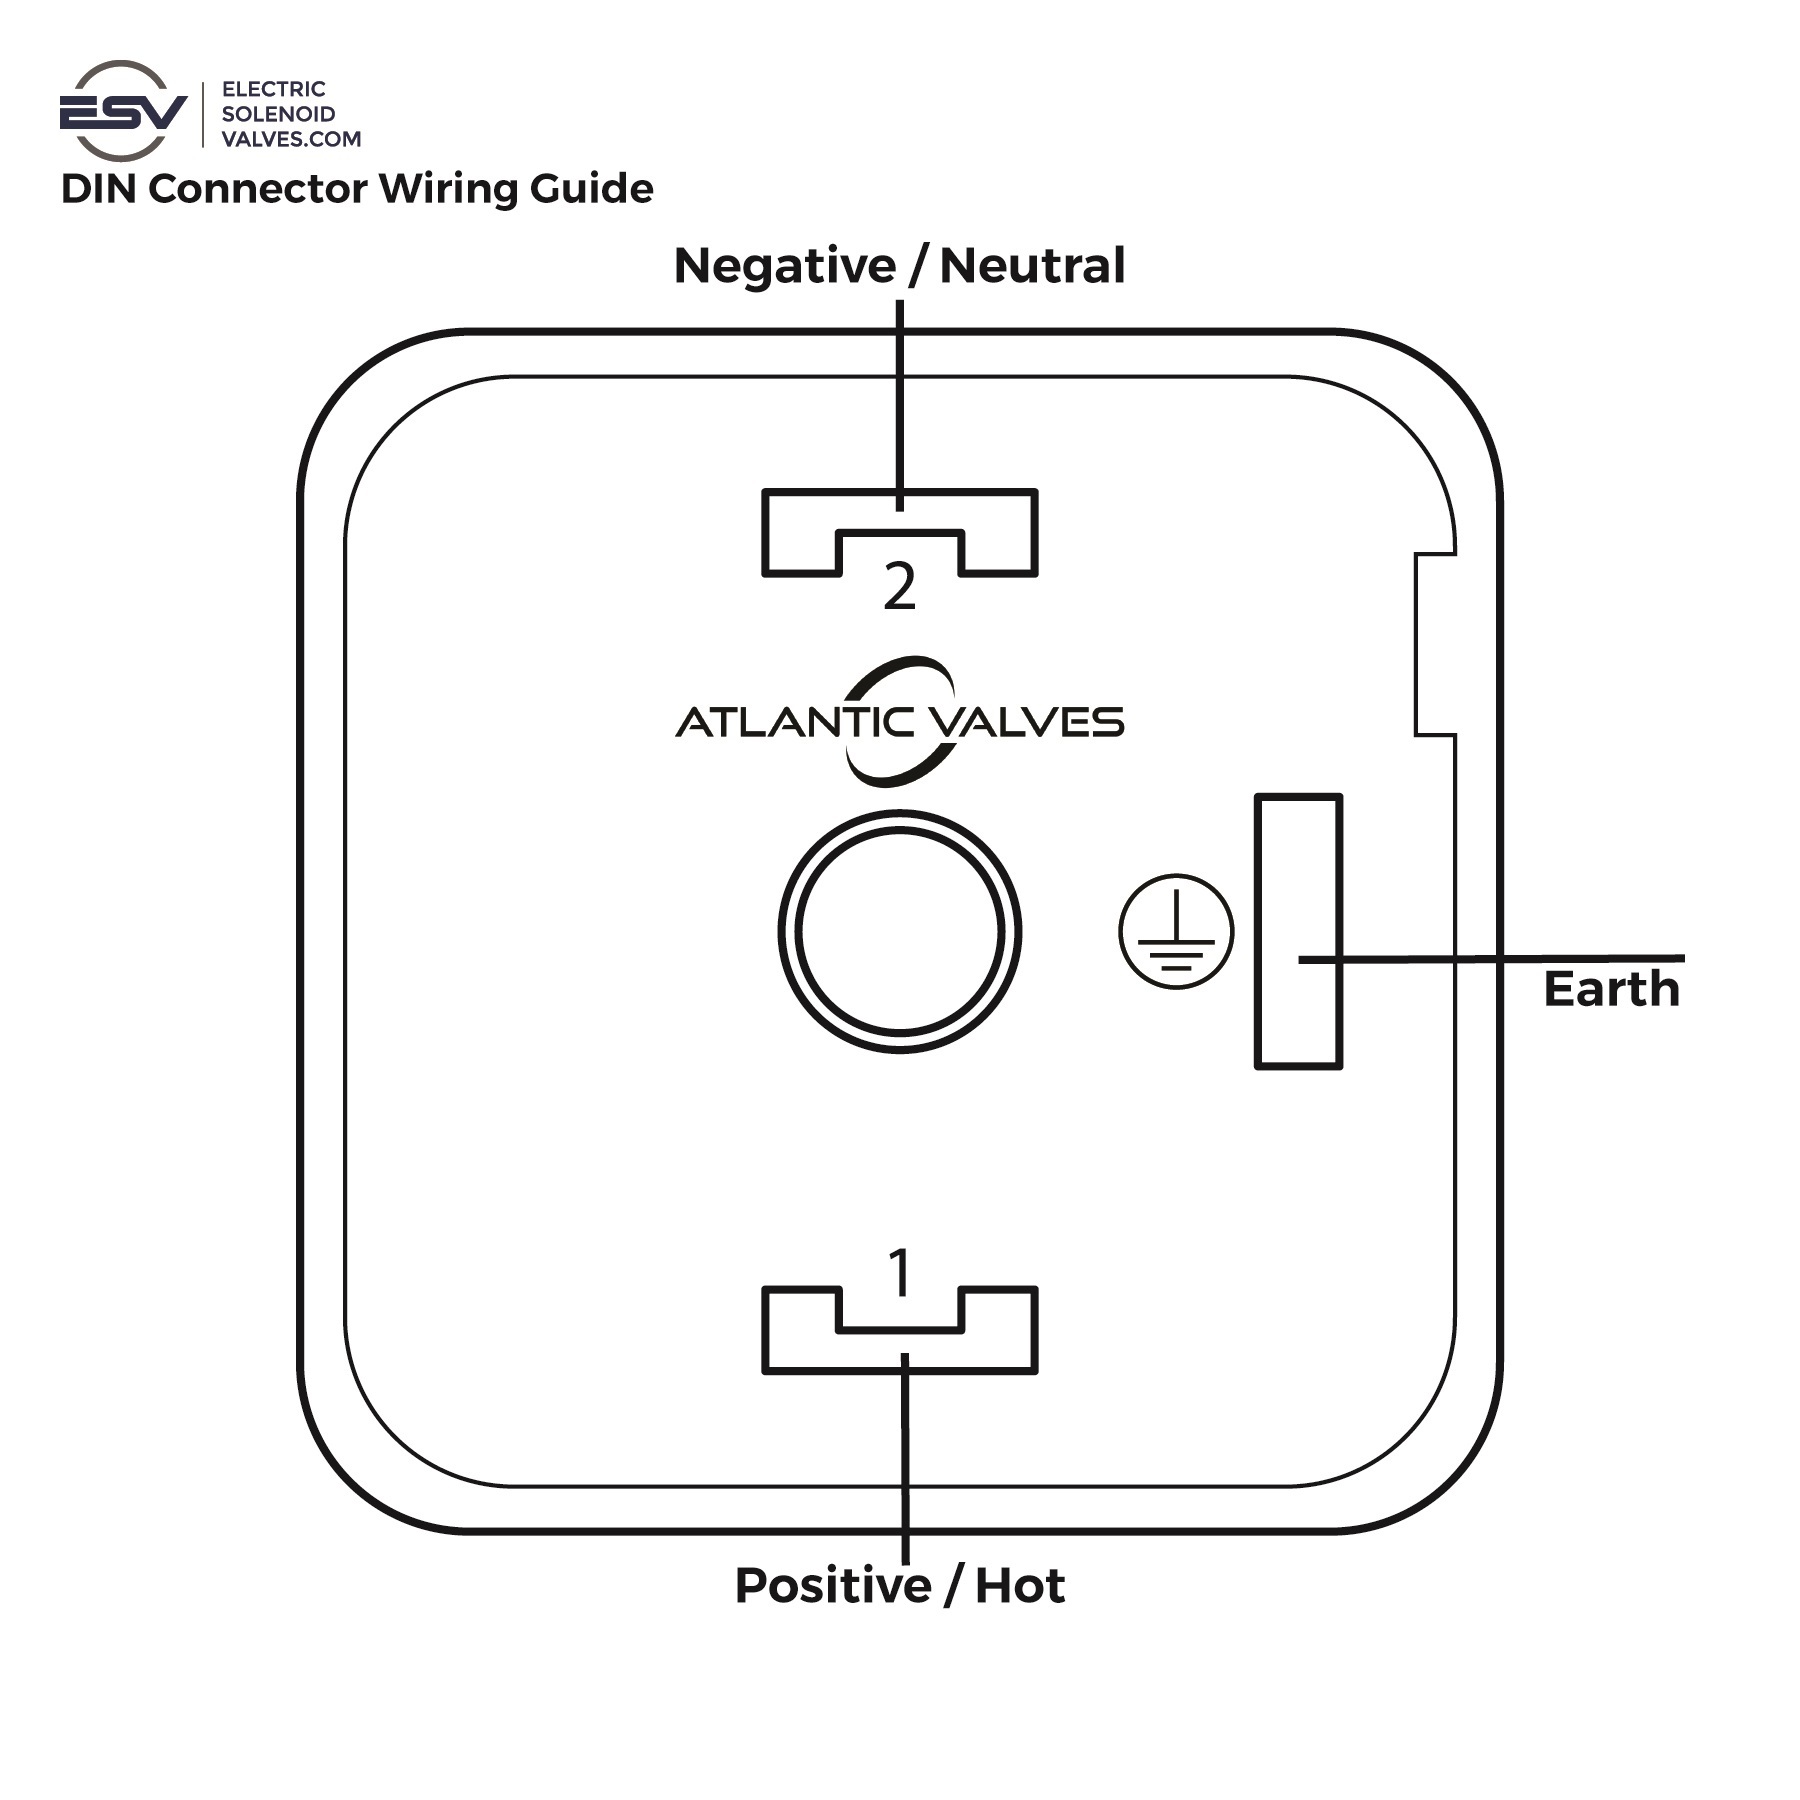
- Inside the housing, locate the screw terminals:
- Terminal 1: Connect the hot or positive wire.
- Terminal 2: Connect the neutral or negative wire.
- Earth Terminal (for AC voltages only): Connect the ground or Earth wire.
- Ensure all screw terminals are securely tightened for a reliable connection.
- Reassemble the DIN connector by reversing the steps above.